My Reintroduction to Digital Picture Frames
About 10 years ago I got the idea to build a digital picture frame based on an old 3Com Audrey (anyone remember those?) that I bought off of eBay.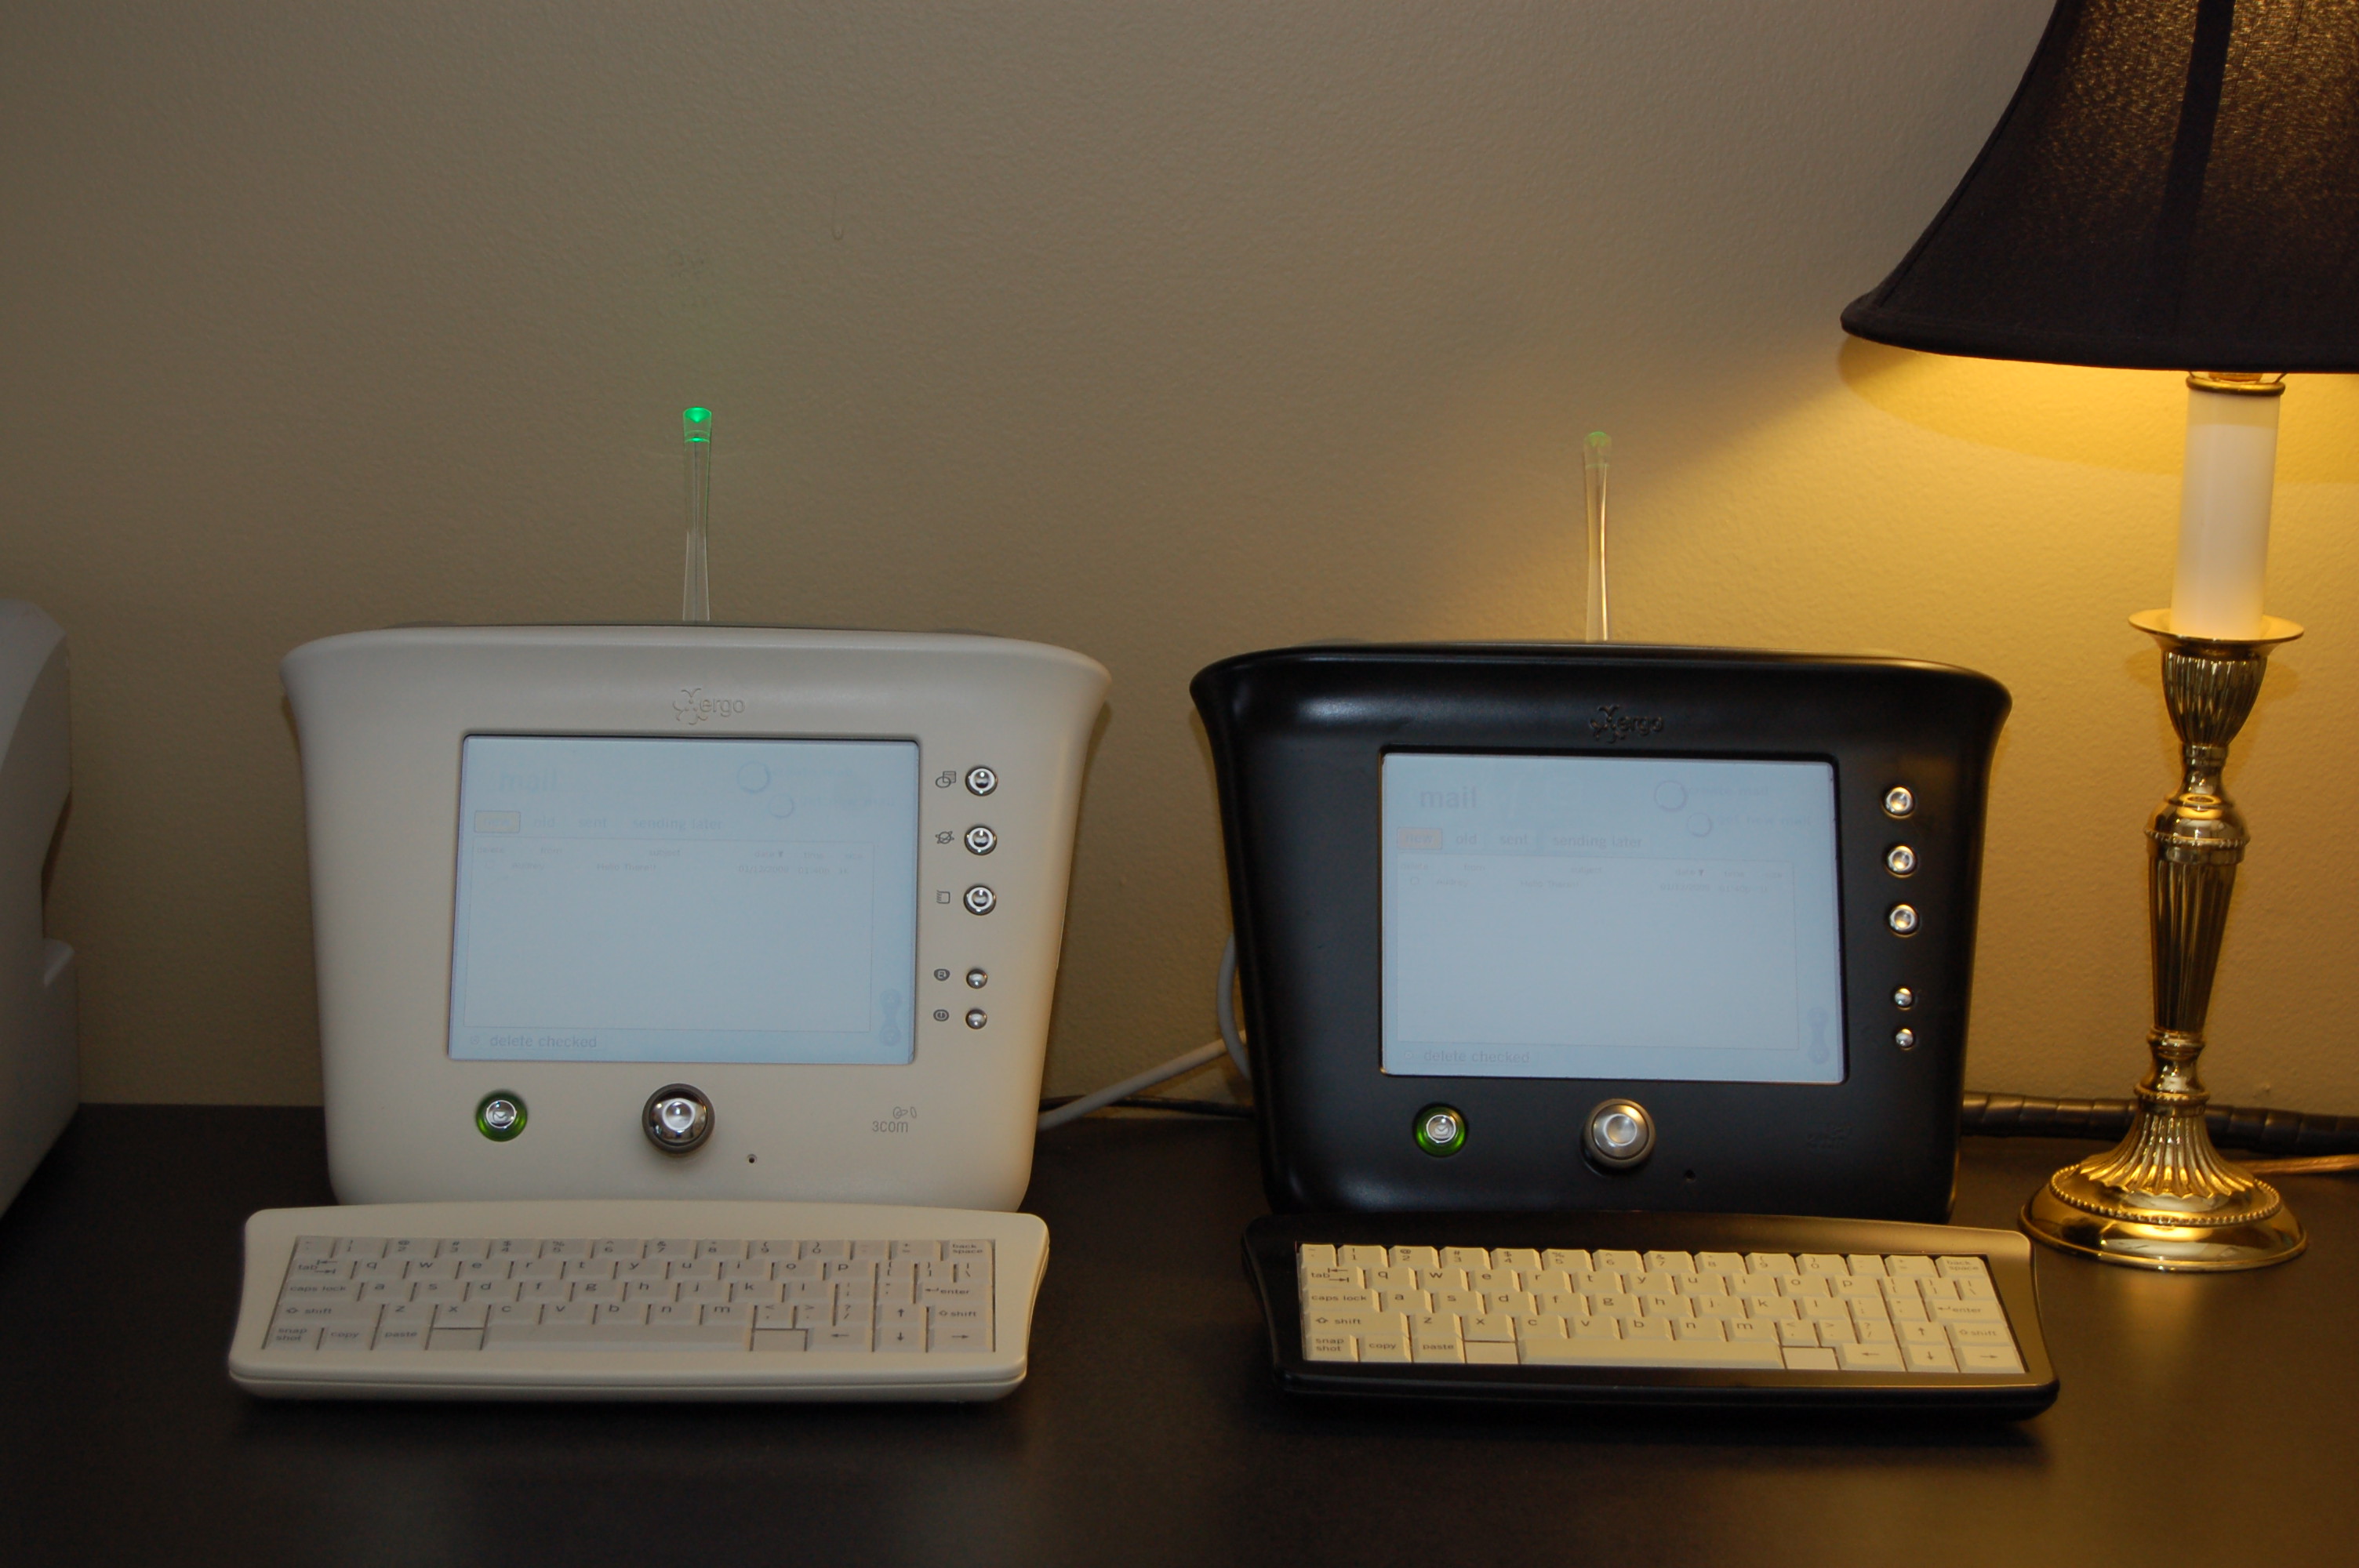
I actually did build it, and it ran for a good while. My memories of it are a little vague, but I recall it was clunky, slow, and it crashed a lot. Around the same time, commercially built digital picture frames were starting to flood the marketplace. Eventually my Audrey frame died and it was replaced with a relatively cheap 7" device that ran off an SD card. It looked something like this:

This thing had a low quality display, but overall it met my needs. I filled the memory card with pictures, and it sat quietly on my desk showing pictures all day long - mostly without crashing. If this was the future, I thought, I would never need to build another custom frame again.
For a long time after this I had no interest or need to build another custom picture frame. From time to time I would come across blogs where individuals shared how they built their own frame out of a used laptop or an old PC motherboard. None of these interested me enough to dust off my tools and take another stab at building my own - until Raspberry Pi.
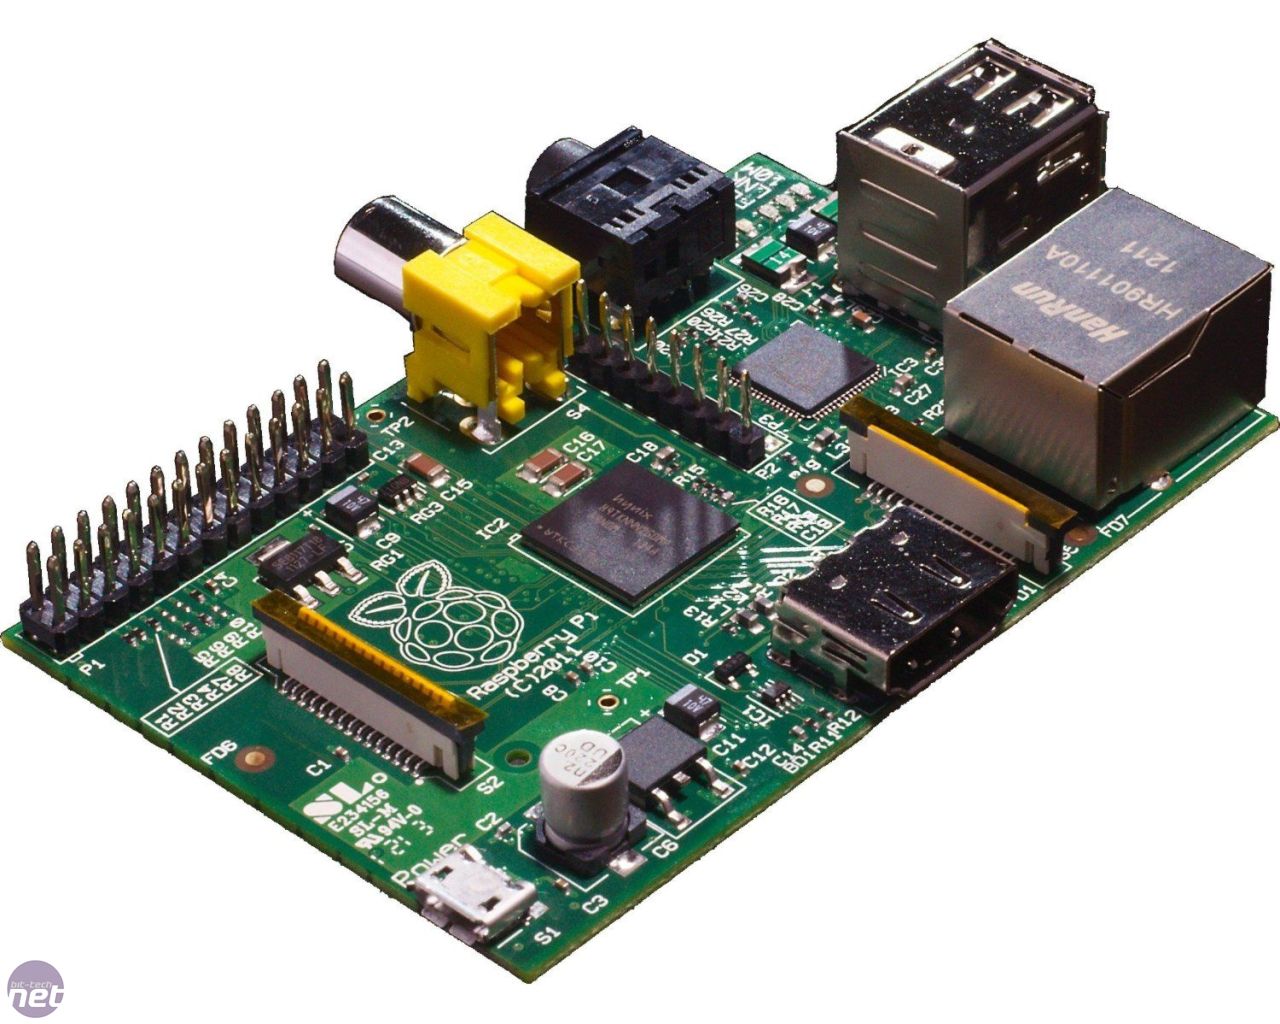
Introduced on February 29th, 2012, this little device made quite a splash in the tech world. I am an avid reader of sites like Engadget, and I listen to the TWiT podcast religiously. So I was aware of the existence of the Raspberry Pi, but as I don't consider myself a 'maker', I wasn't overly interested. I thought it was a wonderful device that someone else could use to create something cool.
That all changed the day a coworker announced he had acquired one for use in his own Pi-based project. He brought it in so I could see it, and I was blown away at it's compact size. The photos I had seen online did not do it justice - it is impossible to grasp how small this device is until you hold it in your hands. And the price point was just unbelievable. Here was a fully capable PC selling at ~$35 USD! Best of all it is a low power device that is 100% silent since it has no cooling fan and no physical disk drives.
Here are the Raspberry Pi specs as shown on Wikipedia (screenshot):

From this point on the gears were turning in my head - I was itching to build something, but I had no ideas. I browsed all the Raspberry Pi projects I could find, looking for inspiration. I came across a lot of hardware-related projects, but I am no electrical engineer.
Eventually I came across Cameron Wiebe's blog 'Raspberry Pi - Daily Deviations Picture Frame' where he shows how to use the Raspberry Pi as a digital picture frame - http://theswitchtolinux.blogspot.com/2012/12/raspberry-pi-daily-deviations-picture.html
The more I thought about it, the more it became clear this would be a great starter project for me. I thought about how much time had passed since my experience with the Audrey, and that by now 19" flat panel monitors must cheap and plentiful on eBay. I could probably build a much larger picture frame than what I had before. I thought about picking up a professional frame for it and displaying it somewhere in my home to serve as a piece of dynamic art.
Cameron's post gave me the inspiration I was looking for, but my initial thoughts were that he was a little short on the details. I knew I would be needing a little more hand-holding, so I kept looking for a better guide.
I finally hit the jackpot with drware's post 'DIY: Digital Picture Frame' at http://thewares.net/item/33. He (I know, I'm only assuming it's a he) did not use a Raspberry Pi in his build, instead he re-purposed an old laptop. I was primarily interested in his approach to managing photos on the frame. Since I was planning for a relatively large frame that would hang undisturbed on my wall, I didn't want to interact with a flash card every time I needed to add or remove photos.
In drwares' project, both the digital picture frame and the host PC are connected to the same local area network and all interaction with the frame happens via SSH. This means I can add and remove photos while sitting comfortably at a PC. The frame periodically checks in with the PC to refresh its cache of photos. Brilliant. Drwares had (in my opinion) the ultimate solution!
The gold in drwares' article are the set of bash shell scripts that he has kindly made available to the public. Having these scripts meant I wouldn't need to figure out how to write bash shell scripts from scratch. Instead I could simply copy/paste them into my file system. It turned out that I did need to modify paths to certain file since they existed in different locations from those referenced in drwares' scripts. Now where to get started?
The Planning Phase
So now that I had settled on a Raspberry Pi project, and I had a solid guide to follow, I needed to plan how I would build the whole thing. First up was the parts list. I knew my project would require 3 major components: the Raspberry Pi, a wifi USB module, and a flat panel monitor. As I investigated further, I found I needed a few more items.The Raspberry Pi is powered by a low voltage USB cable, so I hoped to find a monitor with a built in USB hub. As it turned out, the USB ports on my monitor were nonfunctional so I needed to acquire an externally powered USB hub. To support video-out, the Raspberry Pi has both RCA and HDMI ports. I didn't want to spend too much on a monitor with an HDMI port, so I settled for one with VGA. Therefore the last piece of equipment I would need was an HDMI to VGA adapter. The final hardware list is as follows:
- Raspberry Pi Model "B"
- 19" AOC e950Swn LED Monitor
- 8GB SDHC Card
- Edimax EW-7811Un 150 Mbps USB Wifi Module
- HDMI VGA CONVERTER (BestDealUSA #88017176@@00)
- Picture frame from Michaels (#4-00100-65070-7)
- Powered USB hub (found in my garage)

Note that I originally planned to use the USB charger you see in the photo above but it did not have enough juice to power the motherboard. I substituted a powered USB hub instead, and that worked nicely.
And here's a picture of the sticker on the back of the frame in case you wanted to track down the same one I used:

Now that I had all the parts, it was time to think about how I would tackle this project. The way I saw it, there were 2 distinct areas to work on:
- Configure the necessary software
- Build the shadowbox enclosure for the electronic components.
Planning is Everything
To design the enclosure, I turned to my new favorite tool: SketchUp. Another co-worker had previously introduced me to this amazing, free application.SketchUp is an easy to learn 3D modeling tool that helps you design and build objects in 3D. This tool probably saved me from painting myself into a corner on more than one occasion. It enables you to create the pieces of your project in real-life proportions so you can assemble them in 3D space and see how they would fit together.
This gives you the opportunity to anticipate and plan around any problems before you cut your first piece of wood. I learned how to use SketchUp by the seat of my pants, but it was very easy to learn. I should add that I'm neither a designer nor a 3D modeler; here's the first project I modeled in SketchUp and later built in real life (I made some last minute modifications) -

On to the Software
I started by installing the Raspbian OS. This turned out to be incredibly easy. I started by downloading the image from the Rasberry Pi site at http://www.raspberrypi.org/downloads. Since I was burning the image to the SD card using my PC, I also had to download the Win32DiskImager utility.
This utility proved to be invaluable as I had many false starts in getting my Raspbian OS properly configured. LifePro tip#1: Backup, and backup often. Once you have imaged your SD card and completed a fair amount of customization, you'll want to return to the Win32DiskImager to create a backup image of your SD card. Trust me. You'll thank me later.
Other than the utilities built into Linux, I am also using SSH, ssmtp, mailx, rsync, and FEH (for the slideshow).
Expand your Image to Use the Memory Card's Full Capacity!
The first thing I did after I was able to boot successfully and confirm that I had an internet connection, was to expand the image to use all the available space on my SD card. I was using an 8GB SD card, but noticed the drive reported only 2GB. I learned this is because the Raspbian image was created as a 2GB image and that's all the space it will know about until you expand the file system The good news is that it is very easy to do. From the raspi-config screen, select the
expand_rootfs option and it takes care of the rest. To bring back the raspi-config screen, just type this command from a terminal window:
sudo raspi-configReview Goals of the Digital Picture Frame Project
Now we have everything in place to start following drwares' guide. He states the goals of his project at the top of the article. I'll restate them here:
- When powered on, the frame should boot, log on to x windows, and start a slide show automatically (note: in my implementation I start the slideshow manually).
- The frame will connect to a TCP/IP network and receive an IP address via DHCP.
- If the IP address changes, the frame should email me with the new IP address.
- SSH server should be enabled and will be the primary way to interact with the frame when needed.
- The frame should phone home every so often and sync its local copy of photos with those contained in a directory on one of my home servers.
- The display on the frame should be set to turn off during the night and turn back on in the morning.
Enable SSH on the Client
SSH on the client can be enabled from the raspi-config screen.
Enable SSH on the Server
I am using a Windows 8 machine as my host computer, so setting up and installing an SSH server for the frame to communicate with was a little challenging. I was lucky enough to stumble across Brent Norris' instructions on setting up SSH on a Windows machine using the freely available Cygwin tools. His article is available here -http://www.brentnorris.net/rsyncntdoc.html
He did a great job of zipping up all the files needed, so it saved me a lot of additional Googling. If you follow the steps in his page carefully, you will end up with a Windows service for the SSH server.
Create your Directories
From a terminal window, switch to the pi home directory and create a new directory calledframe with subdirectory called photos.cd /home/pi
mkdir -p /home/pi/frame/photosThe custom scripts will be stored in the
/home/pi/frame directory and the local cache of photos will be stored in /home/pi/frame/photos. You may also want to create an extra directory at /home/pi/frame/newphotos where you can place a separate set of photos to display once (e.g. vacation photos).Download and Install the Software Packages
Next, run theapt-get command from a terminal window to update the list of available programs:sudo apt-get update
Download and install the rsync client that will enable the frame to compare it's cache of images against those on a host server and synchronize its list of photos with the server. For example, if a file is added or deleted from the host, rsync will add or remove it from the picture frame.
sudo apt-get install rsync
Install the frame's image viewer program, FEH:
sudo apt-get install feh
We don't want to see the GUI's pointer during the slideshow, so we install
unclutter to hide it:sudo apt-get install unclutterOne of the goals of this project is to have the frame send periodic updates via email, so we need to install an SMTP program to do this:
sudo apt-get install ssmtpYou'll want to modify
/etc/ssmtp/ssmtp.conf to point to your SMTP mail server. I chose to use my GMail account for this. If you also want to point to Gmail's server's, you can follow the Instructions found at:http://www.openstora.com/wiki/index.php?title=Configuring_SSMTP_for_Gmail
Finally, you'll need to install the
mailx utility:I should point out that I ran into an issue installing
mailx. Unfortunately I didn't take notes, but I recall that apt-get notified me that I needed to select an alternate package.sudo apt-get install bsd-mailxNow for the Scripts
Drwares claims to have no training in programming, and while I am a programmer, I have very little experience writing bash shell scripts. These scripts worked for both of us, but there's probably a more efficient way of writing them.The first problem I ran into with the scripts is that I could not just copy/paste them over and have them work (even after modifying the paths). I was in for a lot more work than I anticipated, but by this time I was motivated and up to the challenge. I think the problem came about because drwares wrote his scripts for the Damn Small Linux OS. I had to fiddle with them until they ran successfully under Raspbian Linux.
ip.sh
ip.sh is the script that checks the IP address of the frame and emails me the new address when it changes.#!/bin/bash
#
# Script to email when the IP address changes
# drware@thewares.net
#
RECIP="youremail@gmail.com"
if [ -f /tmp/ip.tmp ];
then
mv /tmp/ip.tmp /tmp/ip_old.tmp
fi
/sbin/ifconfig > /tmp/ip.tmp
if [ -f /tmp/ip_old.tmp ];
then
diff /tmp/ip.tmp /tmp/ip_old.tmp > /tmp/ip_diff.tmp
else
> /tmp/ip_diff.tmp
fi
RUNNING=`cat /tmp/ip_diff.tmp | wc -l`
NUM=10
mv /tmp/ip.tmp /tmp/ip_old.tmp
/sbin/ifconfig > /tmp/ip.tmp
if [ -f /tmp/ip_old.tmp ];
then
diff /tmp/ip.tmp /tmp/ip_old.tmp > /tmp/ip_diff.tmp
else
> /tmp/ip_diff.tmp
fi
RUNNING=`cat /tmp/ip_diff.tmp | wc -l`
NUM=10
if [ $NUM -lt $RUNNING ]
then
cp /tmp/ip.tmp /tmp/ip_mail.tmp
head -n 17 /tmp/ip_mail.tmp | tail -n 1 > /tmp/ip_mail2.tmp
cat /tmp/ip_mail2.tmp | mailx -s "DPF IP Change: `date +%k%Mhrs-%Y%m%d`"
$RECIP
fi
exit 0
turn_off_screen.sh
Theturn_off_screen.sh script does what it says and is used to turn the screen off via cron.#!/bin/sh
#
# Script to turn off display
# drware@thewares.net
#
# Set display so that script will effect screen on frame
export DISPLAY=:0
/usr/bin/xset s reset
/usr/bin/xset s on
/usr/bin/xset s 1
exit 0
turn_on_screen.sh
turn_on_screen.sh turns on the screen on via cron.#!/bin/sh
#
# Script to turn on display
# drware@thewares.net
#
# Set display so that script will effect screen on frame
export DISPLAY=:0
/usr/bin/xset s reset
/usr/bin/xset s off
exit 0
cron_start_frame.sh
Thecron_start_frame.sh script is used to start the slide show after the frame is powered on or rebooted.#!/bin/sh
#
# Script to run Digital Picture Frame using Feh
# drware@thewares.net
#
# Change number below to the duration, in seconds
# for each photo to be displayed
DELAY="10"
# hide the cursor after 15 seconds
DISPLAY=:0.0 /usr/bin/unclutter -idle 15 &
# Start slide show
DISPLAY=:0.0 XAUTHORITY=/home/pi/.Xauthority /usr/bin/feh --quiet --recursive --randomize --full-screen --slideshow-delay $DELAY /home/pi/frame/photos/ &
# Phone home and sync
/home/pi/frame/rsync.sh
exit 0cron_reload_frame.sh
Thecron_reload_frame.sh script is used to restart the slide show on the frame via cron. Restarting the slide show will cause it to display any new photos that have been copied to the frame since the last time it was started.#!/bin/sh
#
# Script to run Digital Picture Frame using Feh
# drware@thewares.net
#
# Change number below to the duration, in seconds
# for each photo to be displayed
DELAY="10"
# Set display so that the script will effect
# the screen on the frame
export DISPLAY=:0
# Stop the currently running Slide show
/home/pi/frame/kill.sh feh
sleep 10s
# Start slide show
DISPLAY=:0.0 XAUTHORITY=/home/pi/.Xauthority /usr/bin/feh --quiet --recursive --randomize --full-screen --slideshow-delay $DELAY /home
/pi/frame/photos/ &
exit 0
manual_restart.sh
Themanual_restart.sh script is used to restart the slide show from the command line. The script asks for input on the duration in seconds that each photo should be displayed.#!/bin/sh
#
# Script to run Digital Picture Frame using Feh
# drware@thewares.net
#
# Set display so that the script will effect
# the screen on the frame
export DISPLAY=:0
# Stop the currently running Slide show
/home/pi/frame/kill.sh feh
clear
echo ""
echo -n "Enter the number of seconds for photo rotation"
echo -n " and press [ENTER]: "
read var_seconds
echo ""
DISPLAY=:0.0 XAUTHORITY=/home/pi/.Xauthority /usr/bin/feh --recursive --randomize --full-screen \
--slideshow-delay $var_seconds /home/pi/frame/photos/ &
exit 0
dir_frame.sh
The dir_frame.sh script is used to restart the slide show with a different set of pictures. It will ask you which sub directory to display. This script is useful when you want to show off photos from a recent trip or vacation, for example.
#!/bin/sh
#
# Script to run Digital Picture Frame using Feh
# drware@thewares.net
#

# Set display so that the script will effect
# the screen on the frame
export DISPLAY=:0

# Stop the currently running Slide show
/home/pi/frame/kill.sh feh

clear
echo ""
echo -n "Enter the number of seconds for photo rotation "
echo -n "and press [ENTER]: "
read var_seconds
echo ""
echo "Available options for the directory are:"
ls /home/pi/frame/photos
echo ""
echo -n "Enter the directory of photos to display and"
echo -n "press [ENTER]: "
read var_dir
echo ""
DISPLAY=:0.0 XAUTHORITY=/home/pi/.Xauthority /usr/bin/feh --randomize --full-screen --slideshow-delay \
$var_seconds /home/pi/frame/photos/$var_dir &
exit 0
kill.sh
Thekill.sh script is called by other scripts and it is designed to stop a running slide show.#!/bin/bash
if [ ! -z "$1" ]; then
PROCESS=$1
PIDS=`ps ax | grep $PROCESS | sed -e "s/.*killp.*//" -e "s/ *\([0-9]\{1,6\}\)
.*/\1/" | grep -v "^$"`
if [ ! -z "$PIDS" ]; then
echo Killing $PROCESS pid=$PIDS
kill -9 $PIDS
else
echo No process $PROCESS in process list
fi
else
echo Usage : $0 process_name
fi
rsync.sh
Thersync.sh script syncs the photos on your frame with the photos on your host computer. drwares built in support for managing frames both in the local network and outside. I am not concerned with managing a frame outside my network so I have commented out the code for this.#!/bin/sh
#
# Script to copy and remove photos on the DPF
# Script requires that a rsync server on a machine
# separate from the DPF be running and configured
#
# drware@thewares.net
#
PATH=/sbin:/usr/sbin:/usr/bin:/usr/local/bin
EXTERNAL="EXTERNAL IP OF RSYNC SERVER"
INTERNAL="192.168.1.87"
#When frame is inside your network and will connect
#via an intranet
rsync -v -rlt -z --chmod=a=rw,Da+x --delete --bwlimit=2048 $INTERNAL::Frame /home/pi/frame/photos/
#When frame is external to you network and must connect
#via the Internet
#rsync -azv
#--password-file=/home/pi/frame/.rsync.pwd \
#--delete --bwlimit=2048 dpf1@$EXTERNAL::dpf1 \
#/home/pi/frame/photos/
exit 0
crontab -e
The last bit of code is not a script per se, but a set of entries in the crontab scheduler. This is what automates all the frame's processes - it essentially calls all the scripts we just covered.From a terminal window, type the following command:
crontab -eThis launches a text editor loaded with the current crontab settings. Enter the following code in the editor:
#
#
MAILTO="youremail@gmail.com"
#
#
# Phone home and sync every 4 hours
15 */4 * * * /home/pi/frame/rsync.sh

# Check IP address every 30 minutes
*/30 * * * * /home/pi/frame/ip.sh

# Restart Frame every morning at 5:30
# to include any new photos in rotation
30 5 * * * /home/pi/frame/cron_reload_frame.sh

# For Frame at home:
# Turn off display Sunday - Thursday at 10:45 and
# Turn off display Friday, Saturday at 0:15 and
# Turn on display Monday - Friday at 5:59


# Restart Frame every morning at 5:30
# to include any new photos in rotation
30 5 * * * /home/pi/frame/cron_reload_frame.sh

# For Frame at home:
# Turn off display Sunday - Thursday at 10:45 and
# Turn off display Friday, Saturday at 0:15 and
# Turn on display Monday - Friday at 5:59
# Turn off display Monday - Friday at 7:30
# Turn on display Monday - Friday at 15:59
# Turn on display Saturday, Sunday at 7:59
45 22 * * 0-4 /home/pi/frame/turn_off_screen.sh
15 0 * * 0,6 /home/pi/frame/turn_off_screen.sh
59 5 * * 1-5 /home/pi/frame/turn_on_screen.sh
30 7 * * 1-5 /home/pi/frame/turn_off_screen.sh
59 15 * * 1-5 /home/pi/frame/turn_on_screen.sh
59 7 * * 0,6 /home/pi/frame/turn_on_screen.sh

45 3 * * * crontab -l > /home/pi/frame/crontab.bk
UPDATE 2: Also thanks to user Brandon for pointing out you must download and install x11 in order to use the XSET commands in the scripts turn_on_screen.sh and turn_off_screen.sh. To install, run this from the command line: sudo apt-get install x11-xserver-utils
As far as software and configuration, that's about it! This is a good time to test out the entire system at this point and confirm that all your scripts are working as expected.

Constructing the Shadowbox
The shadowbox is the enclosure that holds the Raspberry Pi motherboard, the USB hub, and the monitor. I was lucky that the frame I chose happened to have (for lack of a better word) a lip that extended out about 1/2" around the perimeter. This made it possible for me to build a box that would fit snugly around this lip and secure the frame without need for additional latches, Velcro, or other mechanisms. Here's what it looks like:
Now as I mentioned earlier, I spent a considerable amount of time inside the SketchUp application planning how my frame would be put together. The model I came up with for this project was considerably more complex than my previous project, and didn't look nearly as good as the final product. I'll say again, I'm not a designer or 3D modeler. My focus was on making sure the measurements of the objects matched their real life counterparts. When I was confident everything would fit and I knew where I needed to cut, and where I needed to drill, I got started working on the real thing. Here's my model:

I started with the sides of the box and cut them so they would fit together around the outside of the frame's 'lip'. Here's what the parts looked like after I finished cutting them:

A couple of things to point out here. The piece with the large circle is the bottom of the frame and the hole allows the power cords to be passed through. The piece on the opposite end has lots of smaller holes, so this is naturally the top of the frame and those are ventilation holes. The smaller piece at the top of the photo (which is the right side of the frame) needed to have a hole cut into it to allow the USB ports to extend out the side. That hole hadn't been cut at the time of this photo.
Once I had all my pieces, I fastened them together using a combination of tiny nails and Gorilla Wood Glue. That stuff is awesome. Here's what it looks like with the frame firmly inserted in the box:

and another angle:

I let the glue dry overnight then set out to apply a light stain and varnish. A few days later I was ready to start fastening all the parts to the inside of the shadowbox. Before I did that though, I needed to drill holes in the back to pass the screws through to fasten the monitor to the frame. This was extremely difficult for me, because I am not familiar with the techniques of wood working. I'm sure there's an established way of figuring out where holes should be drilled so the monitor is aligned correctly within the box, but I gave it my best shot.
My technique was to use a sharpie pen and paint around the drill holes on the back of the monitor, then quickly drop it into the shadow box. I did my best to make sure it was aligned properly when it landed on the wood. When I picked it up I could see marks where I needed to drill.
Unfortunately this method was not foolproof and the monitor ended up being crooked after my first attempt. I had to drill additional holes near the originals and I got it right the second time. I filled in the extra space around the holes with wood filler.
Now it was time to start securing the components. I put in everything but the monitor:

Last but not least I secured the monitor in place:

With everything plugged in and secure, it was time to make sure everything was still working. And it does!

The very last thing was to cut a custom matte to fit between the monitor and the frame. The purpose of this is to hide the empty space around the monitor and give the frame the overall appears of a professionally mounted painting. This exercise required that I cut a rectangular piece of matting that would fit behind the frame, and a smaller rectangle inside to expose the screen. I drew lines lightly in pencil then used an Xacto knife to cut the whole thing out cleanly.
Finally, the finished product:

The last thing I need to do is hide the power cords. I purchased a cord cover kit from Home Depot that should do the job. Something like this:

Great, Sam! Similar idea was one of the reasons I had bought a Raspberry Pi, but still dreaming about it. You made it beautifully in every respect, I like it very much, thanks for sharing. It's a good help for those who's going to make something like this.
ReplyDeleteThanks Sergei. This was a lot of fun for me, and I thought it was a good one to start with. Looking forward to my next Raspberry Pi project, just need a good idea!
DeleteThanks Sam,
ReplyDeleteGreat How to.
I had created a Picture frame some 5 years ago with one of the first Intel ATOM mother boards running XP and a slide show for screen saver. This works pretty well, however its time to create a lower power one with my new Raspberry PI, to get good view angle I also purchased an IPS monitor something I wish I knew about with my first one.
Thanks Troy. Raaspberry Pi runs at extremely low voltage. The biggest power draw is the monitor. No way around that for now unfortunately.
DeleteHello, I need some help please !
ReplyDeletepi@raspberrypi ~ $ frame/ip.sh
mv: try to overwrite `/tmp/ip_old.tmp', overriding mode 0755 (rwxr-xr-x)? xr-xr-xr
mv: try to overwrite `/tmp/ip_old.tmp', overriding mode 0755 (rwxr-xr-x)? xr-xr-xr
frame/ip.sh: line 26: syntax error near unexpected token `fi'
frame/ip.sh: line 26: `fi'
??? What to do ??? I'm a complete beginner and help will be appreciate, thanks
Sorry for bad english I'm french
Oh no, I think you may have found an error in my script! I don't have access to my frame right now, but looking at the code above, I think you just need to remove the 'fi' on line 26. Let me know if this helps, thanks.
DeleteMany thanks! The error disappear ! I'll test all the scripts because I try to do near the same than yours, only I want my PI to connect to my Dropbox (I think i can found a script on the web). It's really a good project thanks for sharing. I 'll tell you about my progress.
ReplyDeleteThat's great, good luck! Integrating with Dropbox sounds like an interesting approach. I look forward to hearing your progress!
Deletepi@raspberrypi ~ $ frame/cron_reload_frame.sh
ReplyDeletesed: -e expression #2, char 20: unterminated `s' command
No process feh in process list
Me again, pfouuuu...
Have you got an idea for that ? Thanks again.
Hi Nicolas. I think this problem is happening because of a carriage return after the *\([0-9]\{1,6\}\) in kill.sh. You should make sure that is one complete line with no returns.
DeleteDid something similar, but with an old 15.4" laptop panel, LCD driver board (from eBay) and a Raspberry Pi. Very tidy little build, bit on the pricey side though. My photos are stored on USB to the Pi, but I remote into it and copy a load from my Google Drive account periodically
ReplyDeleteHi, I have now got mine to work as it should, I had to skip the sudo infront of the crontab -e cause it didn't do anything when the crontab was root spesific.
ReplyDelete/Jan
Thanks for the tutorial!
ReplyDeleteA few things I encountered that weren't mentioned (my way may not be the best, but it works for me):
Running FEH at LXDE start/logon:
Create the file autostart (and the path to it) "~/.config/lxsession/LXDE/autostart", then add this line into the autostart file: "/home/pi/frame/cron_start_frame.sh"
In order to use xset commands, install x11: "sudo apt-get install x11-xserver-utils"
rsync with Public Key
1. create key "ssh-keygen -t rsa -b 2048"
2. copy that key to remote_server " ssh-copy-id -i ~/.ssh/id_rsa.pub user@remote_server_ip"
3. command in rsync.sh "rsync -rltavz -e "ssh -i /path/to/local/keyfile" --chmod=a=rw,Da+x --delete --bwlimit=2048 user@remote_server_ip:/remote/path/ /home/pi/frame/photos/
Again, thanks for your hard work and putting the time into sharing these instructions.
Hi, you have done nice project. I'll try to replicate it later, but without networking.
ReplyDeleteI have in plans to make one few gigs NTFS partition to the SD card. That partition should be readable in Windows to transfer pictures to SD-card. When the card is plugged back to pi and whole thing is powered on, NTFS shoud be mounted automatically and slideshow starts to show pics from mounted partition.
About that IP check / mail script. I have couple remote managed computers which uses noip.com 's dynamic DNS and their IP-update program (both free). That way you don't need to fill your mail with IP notifications or even need access to your email, just need to remember self-created dns name.
Maybe the same thing could be used in photo frame too to make things differently / easier ?
Great work, do you know if there is a way to get out of the script by clicking on the screen? I am running this script with a touch screen monitor
ReplyDeleteThanks
So I bought a Raspberry Pi because I make slides every week for the monitors in the narthex of my church. I dump the files in a Google Drive folder that I have shared with the pastors. One of them will download the files from Drive every Sunday morning to USB thumb drives and then go stick them into the back of the monitors and turn them on. I have been looking for quite a while at kiosk style systems that allow remote updating, but they are all so dang expensive. Then the light bulb went on in my head last fall that a Raspberry Pi should be able to accomplish what I wanted to do for a fraction of the price. I have no idea why I didn't think about it before and I don't know why I suddenly thought to take a look at Raspberry Pi.
ReplyDeleteI bought one Raspberry Pi to experiment with right before Christmas 2015. This of course was a little scary for me because my programming skills are not that great. I keep searching for a good tutorial to follow and modify for my own purposes. I think yours may actually do the trick for me. Looking forward to finally giving this a try! I'll definitely have to let you know how everything comes out.
That's cool, thank you for the feedback. I think the Raspberry Pi will be exactly what you're looking for. Mine is still running every day without a hitch. Well, actually I needed to install a tiny fan over the CPU to keep it cool because it would freak out every once in a while.
DeleteI think this post has all the code you will need and it has been tweaked over the years as I received suggestions from others. Let me know if you run into any issues and I'll see if I can help.
Hello, I just want to ask you, if I can use your picture from the Raspberry Pi for my scientific work?
ReplyDeleteIt's just for school and will not get published.
The blog seems to share interesting tips custom picture frames Keep sharing such blogs.
ReplyDeleteHi. This is exactly I am looking for. Just want to cross since this is quite long time are there any updates lately ?
ReplyDelete